Showing posts with label diy. Show all posts

Wednesday, December 15, 2010

{Make} - Holiday Cocktails


Candy Cane Martini
Makes one cocktail
1 candy cane, crushed, for garnish
2 ounces strawberry vodka
4 dashes white creme de menthe
2 1/2 ounces cranberry juice
ice cubes
  1. Place crushed candy canes on a small plate or saucer. Wet the outside rim of a chilled martini glass with water. Holding the glass by the stem, rotate the rim to coat with candy.
  2. In a cocktail shaker, combine vodka, creme de menthe, cranberry juice, and ice; shake until well combined. Strain into prepared glass; serve immediately.

Reindeer Martini

2 parts vodka
1 part Frangelico
1 part Malibu
splash of cream

Shake over ice and strain to serve straight up in a martini glass, garnished with a cherry and two cinnamon sticks for antlers.


Kentucky Eggnog
1 liter Maker's Mark bourbon
-1 quart milk
1 quart heavy cream
 2 dozen eggs
1 1/2 cups sugar
Garnish: nutmeg

Separate eggs and beat yolks until creamy. Whip sugar into yolks. Beat whites until they stand in peaks, adding 1/2 cup additional sugar, if desired. Beat yolks and bourbon together. Add whites, beat cream. And add cream and milk to mixture. Add nutmeg to taste and garnish each cup with nutmeg. 

Wednesday, November 17, 2010

{Make} - DIY Giving Tree

{Image Via Jumpstart}

Thanksgiving can be a hectic time with family arriving, kids under foot and meal preparation. Despite how busy it may be, it's important to take time to appreciate and give thanks all the blessings that your family experiences in their daily lives. Creating a giving tree is a great holiday project to get everyone thinking about what they are grateful for, keeping little hands busy and can be a unique addition to your holiday centerpiece.

For instructions on creating a giving tree from paper, you can find a complete tutorial on the Jumpstart blog here. I think that using funky patterned scrapbook paper would be a great way to jazz this project up more.

{Image Via The Gracious Girl}

An alternative to a paper giving tree is one made with real branches. You can find a tutorial on how to create one with real branches here, on The Gracious Girl blog.

Tuesday, November 9, 2010

{Make} - DIY Tooth Fairy Pillow

{Image Via Instructables}

{Image Via Mmmcrafts}

{Image Via Kotori}

Losing a tooth is an exciting and special event in any little one's life. Why not add to the excitement with a fabulous tooth fairy pillow? (And make the tooth fairy's job a little easier at the same time!) Here we have a collection of the best tooth fairy pillow tutorials around. Just simply click on the link below the image to visit each tutorial.

Tuesday, September 21, 2010

DIY - Plush Owls


What a fun project for cute and cuddly favors perfect for a birthday party, baby shower or a little gift for someone special. You can find a complete tutorial for these easy little critters here and keep looking for our new owl collections debuting this week!

Friday, September 17, 2010

Freebie Friday - Printable Party From Fresh Linen

{Image Via Fresh Linen}

Rounding up some more fun free printables for Freebie Friday! Here is a super sweet printable kit from Fresh Linen featuring coordinating invitations, tags, water bottle labels and a game. Perfect for that next baby shower. Grab your free printable party here.

Have  a great weekend!

Thursday, September 16, 2010

DIY - Paper Projects

Scrapbook paper has to be one of the most fabulous craft supplies. Affordable and available in a variety of colors and patterns it is an easy way to incorporate your event theme into every aspect of your event.
 
{Image Via Martha Stewart}

Create a wonderfully chic place mat and cut a "V" shape in the upper corner with a craft knife to make a pop up triangle for a place card.

{Image Via Pepper Design Blog}


Wrap bottles for your event with scraps of your favorite pretty patterned scarpbook or wrapping paper.


 {Image Via Nesting Instincts}


Wrap vases with paper in colors coordinating with the event theme for an elegant centerpiece or display.


{Image Via Thoughtfully Simple}

Cut 1" to 2" strips of paper and secure with glue or tape for inexpensive and coordinating napkin rings.

Friday, September 10, 2010

DIY - Little Pumpkin Baby Shower Projects


Use pumpkins to spell out "it's a boy" (or girl) either by writing on them with a marker or carving them and placing a candle inside. Place them on the front steps to greet guests, as a centerpiece on a table or as a focal point of a room.

{Image Via Martha Stewart}

Create unique and seasonal centerpieces by carving out pumpkins and using them as vases for floral arrangements. Also a great idea for fall weddings!
{Image Via Beau Coup}

Delicious pumpkin brownie pops would be the perfect treat for guests. The queen of cake pops, Bakerella has a tutorial here that could be used to create your own.

{Image Via Gourmet Mom}

These adorable pumpkin cheese balls would look fabulous on the table. Just serve with pretzels, crackers or veggies. Grab the tasty and easy recipe here.

Thursday, September 9, 2010

DIY - Tissue Paper Carnation Monogram

{Image Via Two Little Bells}

I just love this flirty, girly monogram covered in delicate tissue paper caranations. It simply fabulous and what a great way to welcome your guests to a special event. Created by Pam of Two Little Bells for her daughter's birthday this project took a bit of time, patience and only cost $5! Now that's a steal. Inspired to create your own for your next birthday or baby shower? Check out Pam's complete tutorial here complete with pictures and instructions.

Wednesday, September 8, 2010

DIY - Candy Corn Cupcakes


Aren't these fabulous! I am a sucker for cupcakes and candy corn so when I stumbled across this recipe on I Heart Cuppy Cakes I was in heaven. So unique for a halloween party or fall birthday.  I just love them!

Tuesday, September 7, 2010

DIY - Upcycled Cupcake Toppers

{Image Via Amy Bakes Cupcakes}

Ever wonder what to do with all those old books laying around? While some are classics and keepsakes others just become dust collectors once your child outgrows them. Why not make some creative and fabulous cupcake toppers featuring your child's favorite characters? Simply punch the images or phrases out with a scallop scrapbook punch or cut with scissors, mount on coordinating scrapbook paper if you want, attach to toothpicks and jazz it up with a bit of ribbon if you like. Voila! 

Still too much work? Amy Bakes Cupcakes offers crafty cupcake toppers to go along with their delicious menu of cupcakes.

Monday, August 30, 2010

DIY - Frog Prince Cake

{Image Via My Cake School}

Ever enviously watch one of the cake shop shows on TV and wish you could do that? Well now it's your turn to be the Cake Boss with this crazy cute Frog cake design by My Cake School. This fabulous blog offers all sorts of DIY cake designs and projects with simple, clear instructions including this frog cake which would be perfect for your next baby shower or birthday.

Saturday, August 28, 2010

DIY - Something Blue Cocktails

A few delicious blue cocktails perfect for a Something Blue Shower or just an evening with the girls. Enjoy!
Ice Blue Martini
1-oz Hpnotiq Liquor
1/2-oz vodka
2-oz lemonade
Add all ingredients to a cocktail shaker filled with ice
Shake & strain into martini glass
Garnish with lemon twist
Blue Thai Mojito 

Ingredients
1/4 ounce blue Curaçao
1 1/2 ounces Bacardi Limon rum or Bacardi white rum
1 1/2 ounces Coco-Mint Syrup (recipe follows)
1 ounce fresh lime juice
2 ounces chilled soda water

For garnishing
Fresh mint and/or cilantro sprigs
Shaved coconut (optional)


Preparation
Fill a tall glass with ice. Measure in the Curaçao, rum, syrup, lime juice, and soda water. Stir with a bar spoon. Garnish with fresh mint and/or cilantro and a sprinkling of shaved coconut, if using.

Coco-Mint Syrup
 
Ingredients
1 cup shredded sweetened coconut
1/4 teaspoon red pepper flakes
1 bunch fresh mint, torn
12 large sprigs fresh cilantro
2 cups sugar

Preparation
Combine the ingredients in a medium saucepan and bring to a boil. Boil for 2 to 3 minutes. Remove from heat and let steep for 1 hour. Strain, pressing out as much liquid as possible, then discard the solids. Let cool to room temperature. If not using immediately, cover and refrigerate, for up to 1 month, until needed. Remix before using.

Makes: Makes 3 cups, enough for about 16 drinks


Something Blue Cocktail

Ingredients:

  • 2 oz Hpnotiq
  • 2 oz white wine
  • 1 oz ginger ale

Preparation:

  1. Build the ingredients in a Champagne flute.
  2. Serve and toast to a long and happy marriage.

Thursday, August 26, 2010

DIY - Cowgirl Cookie Jars

{Image Via Bakerella}

What a delicious take home idea from Bakerella! Cowgirl cookie jars contain all the ingredients and directions for your guests to bake up some delightful treats at home. These are also easily converted to cowboy cookie jars. A complete tutorial and a cute label download is available from Bakerella here.

Wednesday, August 25, 2010

DIY - Wild West Gold Rush

{Image Via Restless Risa

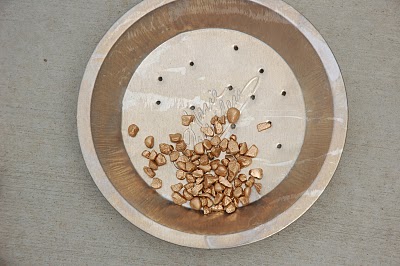
What kind of outlaw party would it be without the gold? When I stumbled across the tutorial on Restless Risa's blog for making your own gold panning station, I couldn't believe what a simple and unique idea it was! Certainly a fun activity for any western themed party.

DIY - Sheriff Badge Rice Crispies


What a great idea! Kim at The Celebration Shoppe created these sheriff badge rice crispie treats for one of the take home goodies at her son's birthday. Easily personalized and super yummy they would be a great addition to any take home treat buffet. You can get all the details on how to make your own with Kim's detailed tutorial.

Friday, August 20, 2010

DIY - Photo Booth

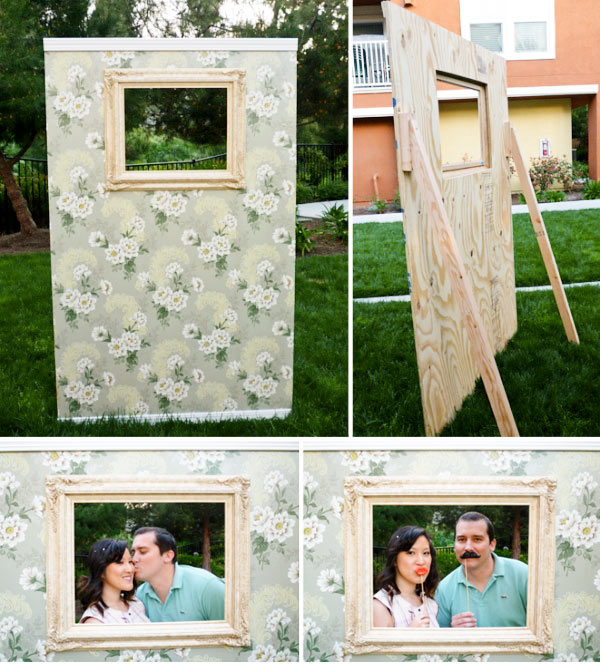
Photo booths have become a popular way to capture those special memories and your guests unique personalities at everything from weddings to birthdays. While professional photo booths can be costly, creating your own can be an easy and fun project that is sure to provide you with an album of amusing and memorable photos.

{Images via Wedding Bee & Swanky Tables}
  • Choose a backdrop for your booth. Simple options include a sheet, tablecloth or curtain hung on a clothesline with clips. Another option is constructing a more elaborate free standing backdrop. 
  • Use your own digital camera or rent one from a service like Camera Renter. Make sure to set the camera up on a tripod and test it to make sure it is centered. To make it easier for guests, set the camera up with a remote cord so no one gets left out.
 {Images via Our Labor Of Love & Ruffled}
  •  Get creative and have fun! Be sure to include a variety of amusing accessories to allow guests to express themselves. Ask your friends and family to go through their closets to find suitable props (ie. boas, funny hats, costume jewelry, etc.) A white board or chalk board is a great way to allow guests to add a personalized message and individualize their photos.
  • As a thank you to guests, print off and send them their pictures after the wedding so they can share the memories of the big day!
 Here are some great tutorials I found for more inspiration. Enjoy!

 DIY Photo Booth Wall via Ruffled

DIY Photo Booth Prop Templates via Miss Fancy Pants 

Sunday, August 15, 2010

DIY - Perfect Party Pom Poms

{image courtesy of Good Things Wedding Favors}

Pom poms are one of the hottest trends right now in party decorating and it's easy to see why. There is just something so delightfully delicious in the sweet simplicity of their shape and the way they magically seem to float in the air.  An easy way to add a festive touch to any occasion and so fun to make. As with all good things here are some fast and easy instructions courtesy of my friend, Martha.

Materials Needed 
  • Tissue paper in desired colors (8 sheets per pom-pom)
  • 24-gauge white cloth-covered floral wire
  • Scissors
  • Monofilament

Step 1)
Stack eight 20-by-30-inch sheets of tissue. Make 1 1/2-inch-wide accordion folds, creasing with each fold.

Step 2) 
Fold an 18-inch piece of floral wire in half, and slip over center of folded tissue; twist. With scissors, trim ends of tissue into rounded or pointy shapes.

Step 3)
Separate layers, pulling away from center one at a time. Fluff and shape as desired